
Setting Up Courses
Before you start
Two constraints that will bite you in the order you hit them:
- A lesson must be saved before content can be added to it. Create the lesson, click Save, and only then can you open it and write. Trying to add content first is the most common way to lose work here.
- The featured image uploads when the course is saved, not when you drop it in the field. The form says so under the box: "Select an image to upload when you save."
Have ready: your chapter list, your lesson titles, and any video files as MP4 under 100 MB each. If your recordings are larger, compress before you start rather than mid-build.
Steps
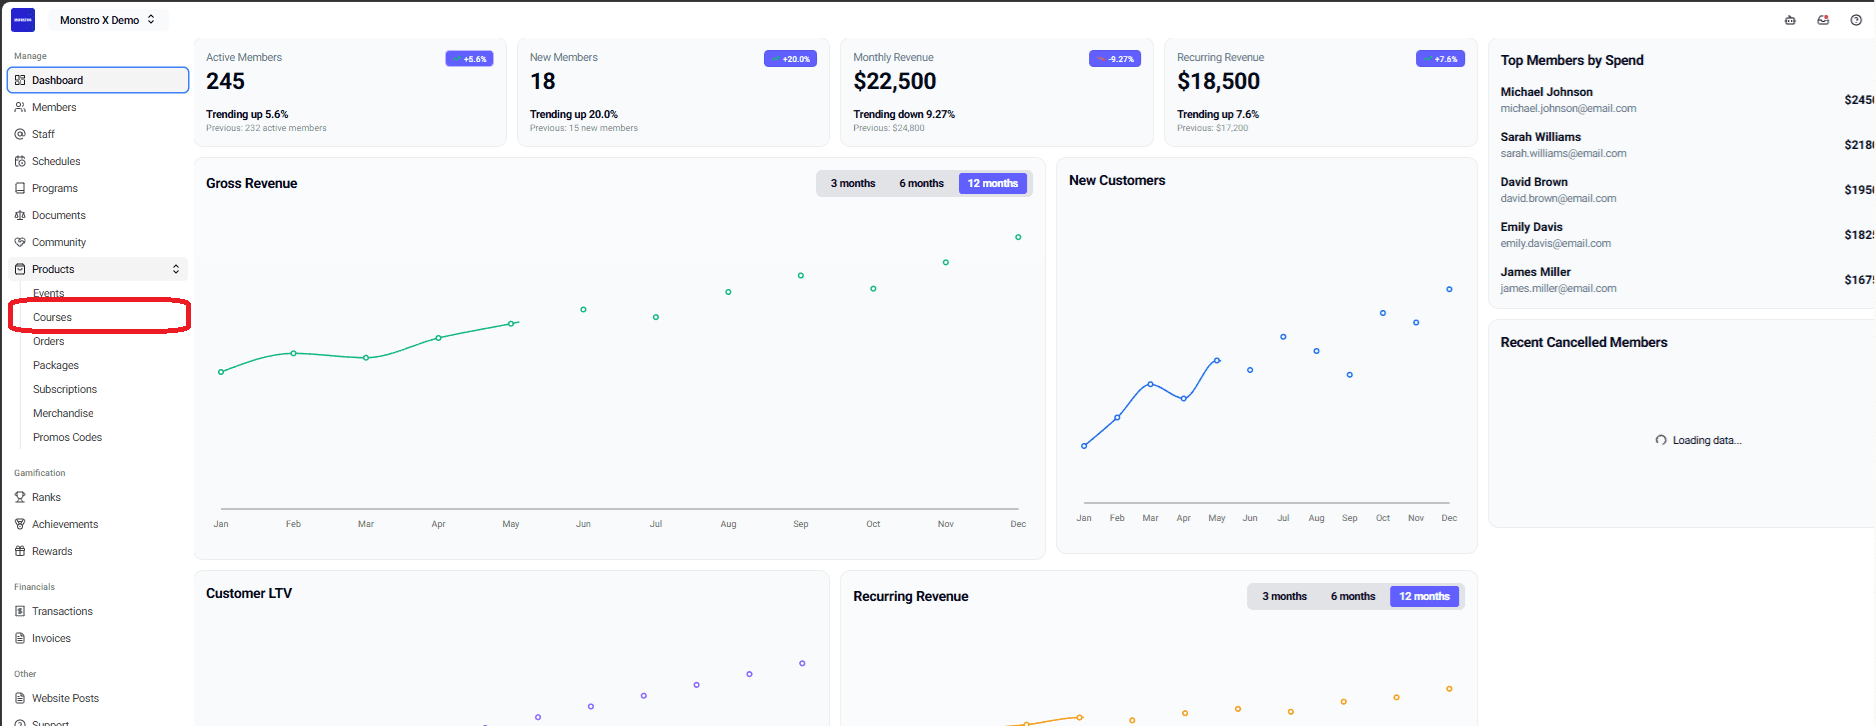
1. Open Courses
Navigate to the left-side panel in the Monstro X app (app.monstro-x.com) and go to Products → Courses.
2. Start a new course
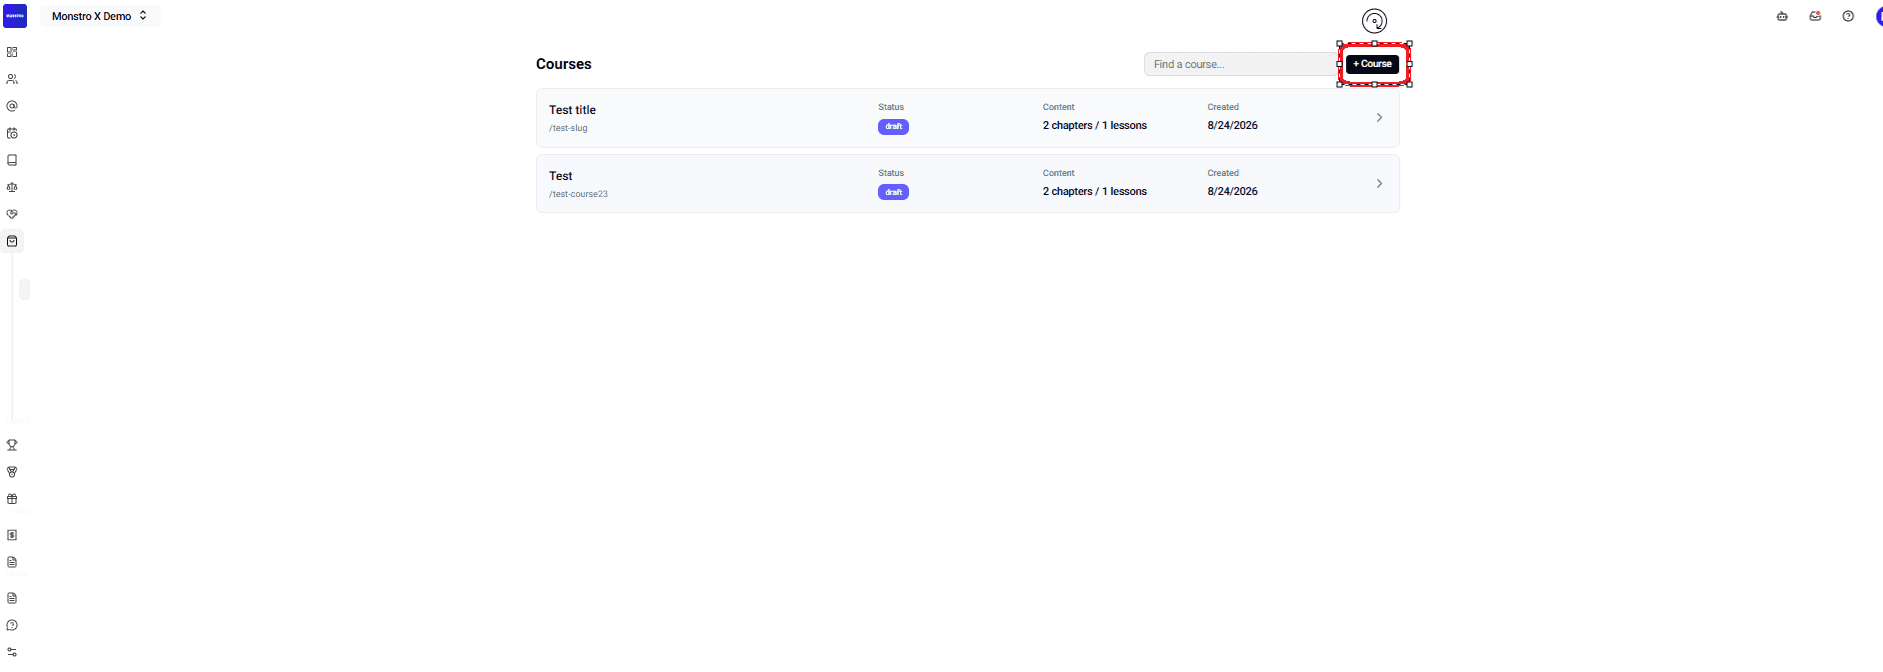
Click + Course, top right of the Courses list.
3. Fill in the course details
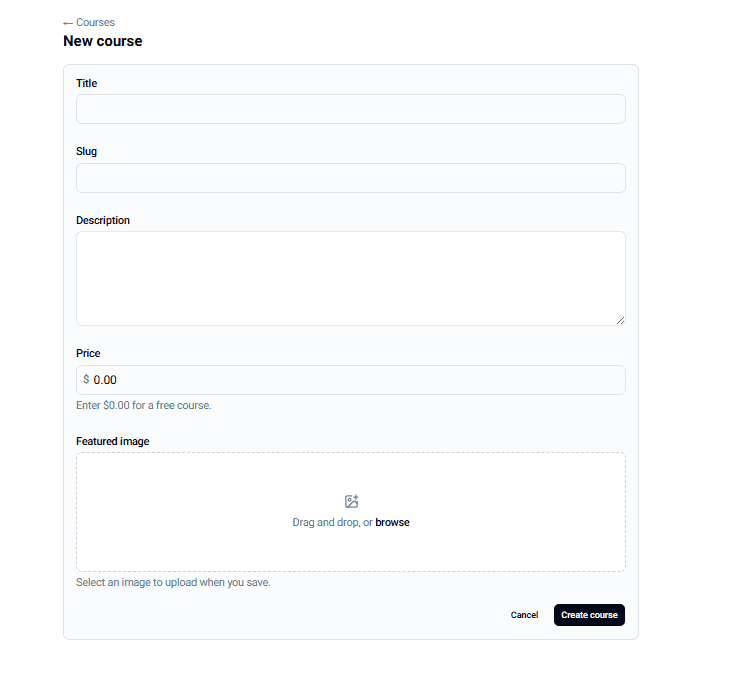
Complete the New course form:
| Field | Notes |
|---|---|
| Title | The name members see |
| Slug | The URL segment, e.g. demo-course |
| Description | What the course covers |
| Price | Leave at $0.00 for a free course |
| Featured image | Drag and drop, or browse. Uploads on save |
Click Create course.
4. Open Chapters
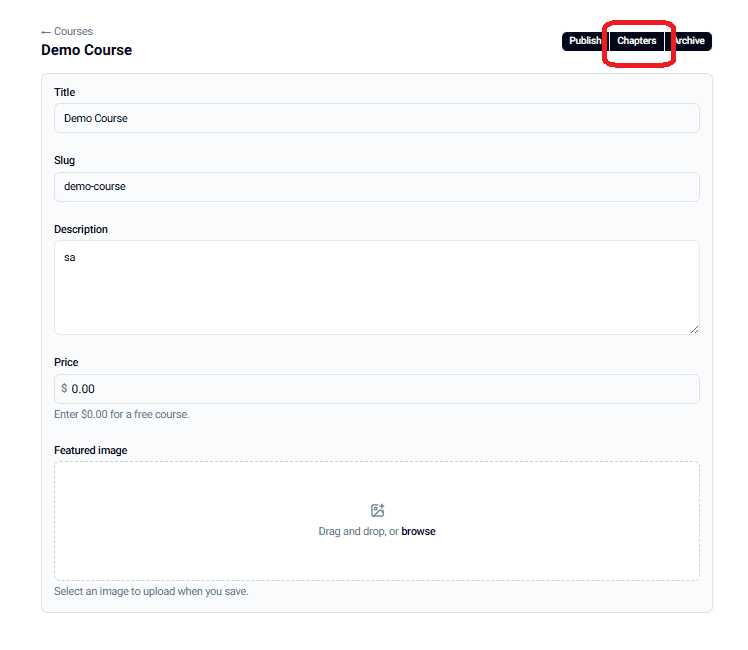
With the course saved, click Chapters in the top-right button row, next to Publish and Archive. This is where you segment the course into chapters and lessons.
5. Add a chapter
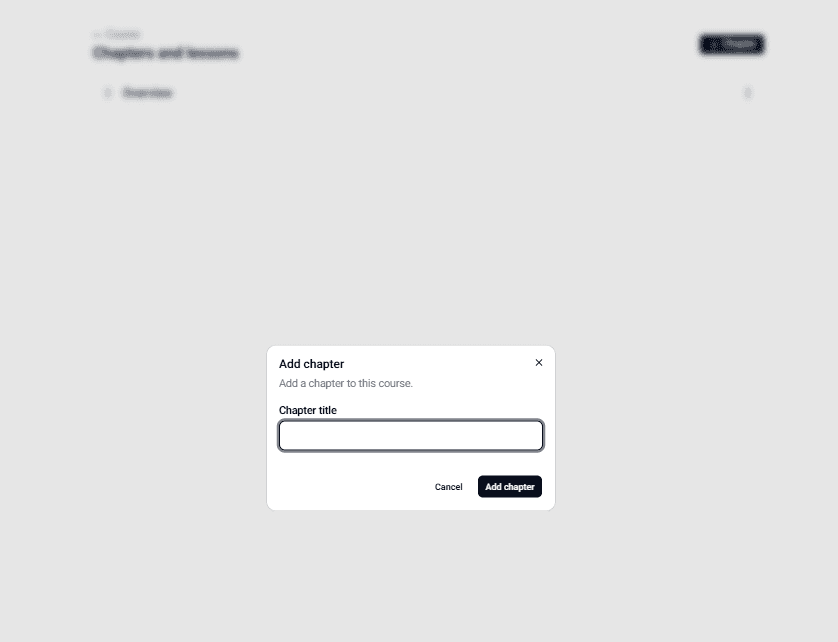
Click + Chapter, enter a Chapter title, and click Add chapter.
A chapter named Overview is already there when you arrive. Use it or rename it, but the course does not start empty.
6. Add a lesson to the chapter
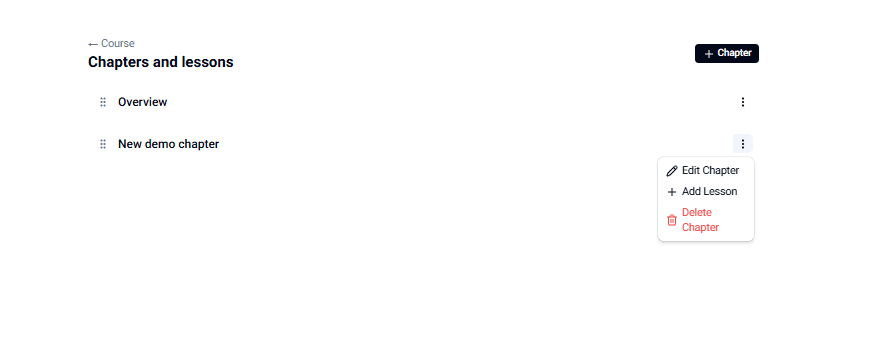
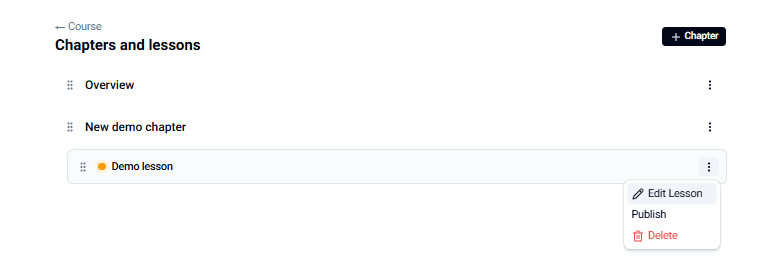
Click the three-dot menu at the right of the chapter row and choose Add Lesson. The same menu holds Edit Chapter and Delete Chapter.
7. Save before adding content
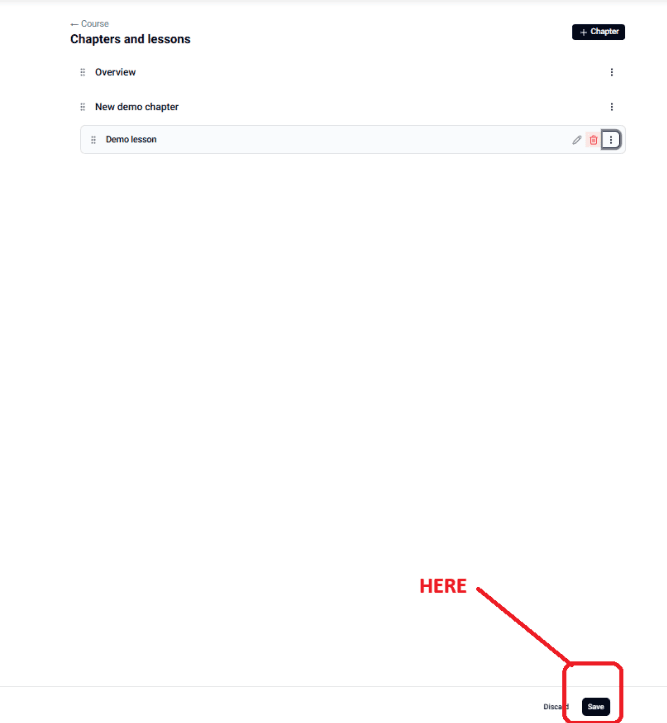
Once the lesson is added, click Save at the bottom right. You cannot add content to a lesson until it has been saved.
8. Open the saved lesson
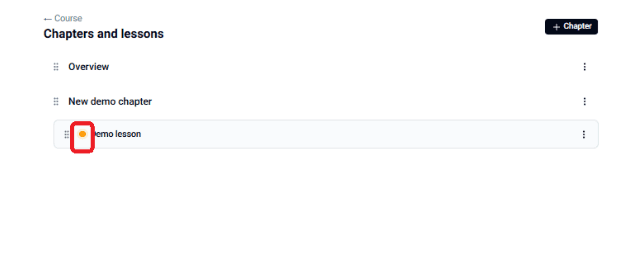
An orange indicator appears beside the lesson name. That is the signal the lesson can now be edited. Click the three-dot menu on the lesson row and choose Edit Lesson. The same menu holds Publish and Delete.
9. Build the lesson
The lesson editor is a canvas with a control rail on the left.
Left rail (everything that is not body text):
| Control | Limit / behaviour |
|---|---|
| Summary | Short description of the lesson |
| Video | MP4, up to 100 MB |
| Video thumbnail | Image, up to 10 MB. Saved with the lesson |
| Attachments | PDF, DOCX, XLSX, CSV, PPTX. Up to 25 MB each |
| Free preview | Toggle. Members can view this lesson without enrolling |
| Status | Draft until published |
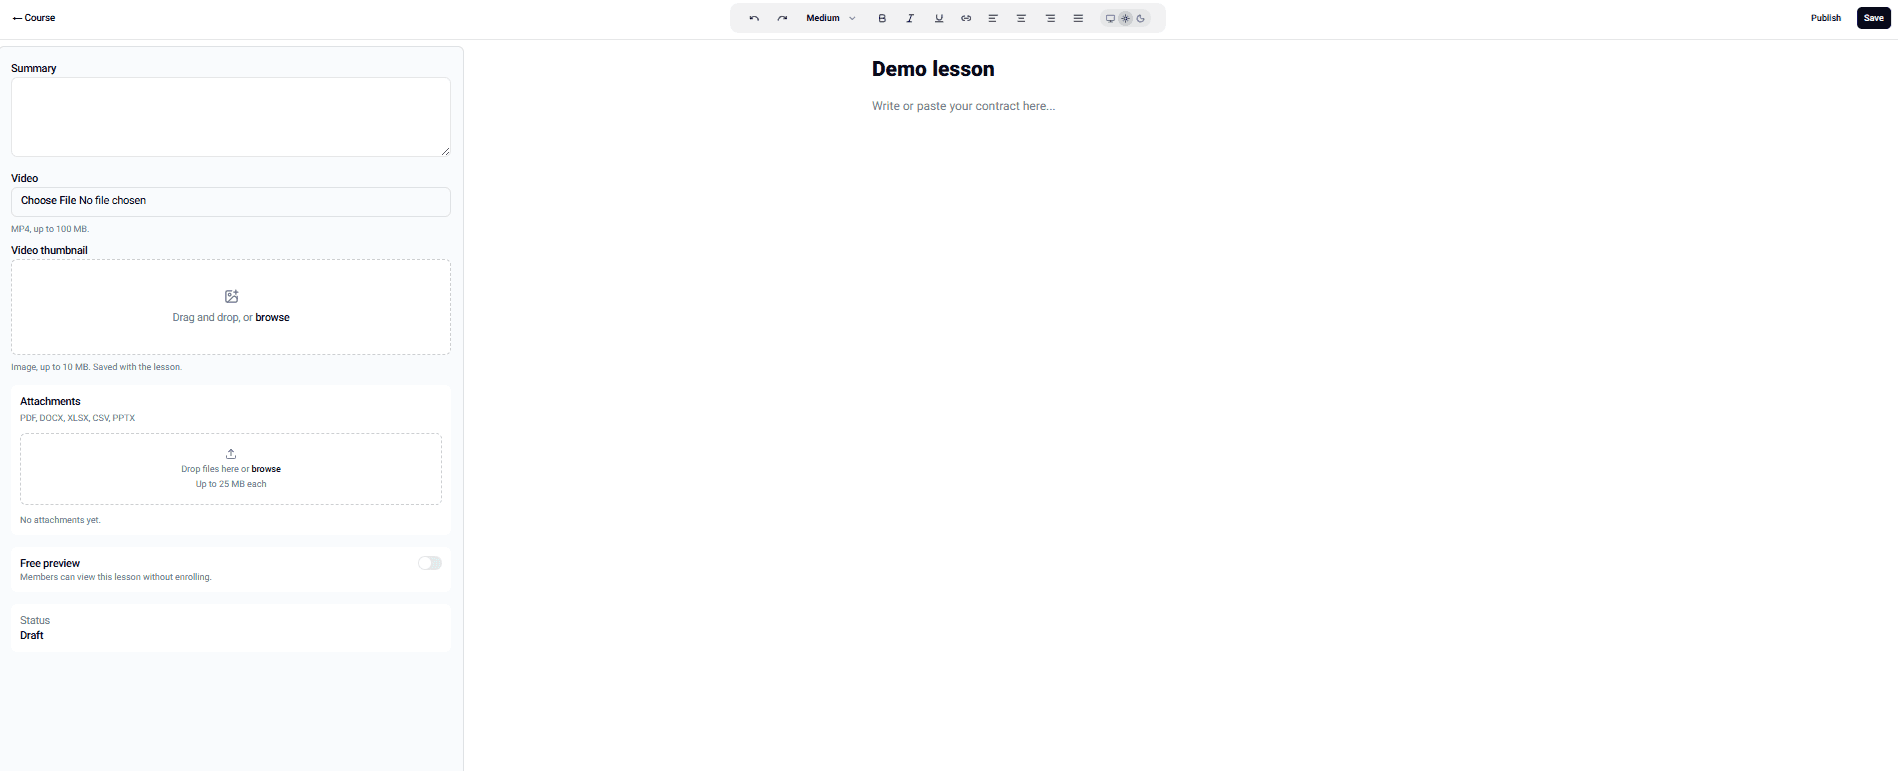
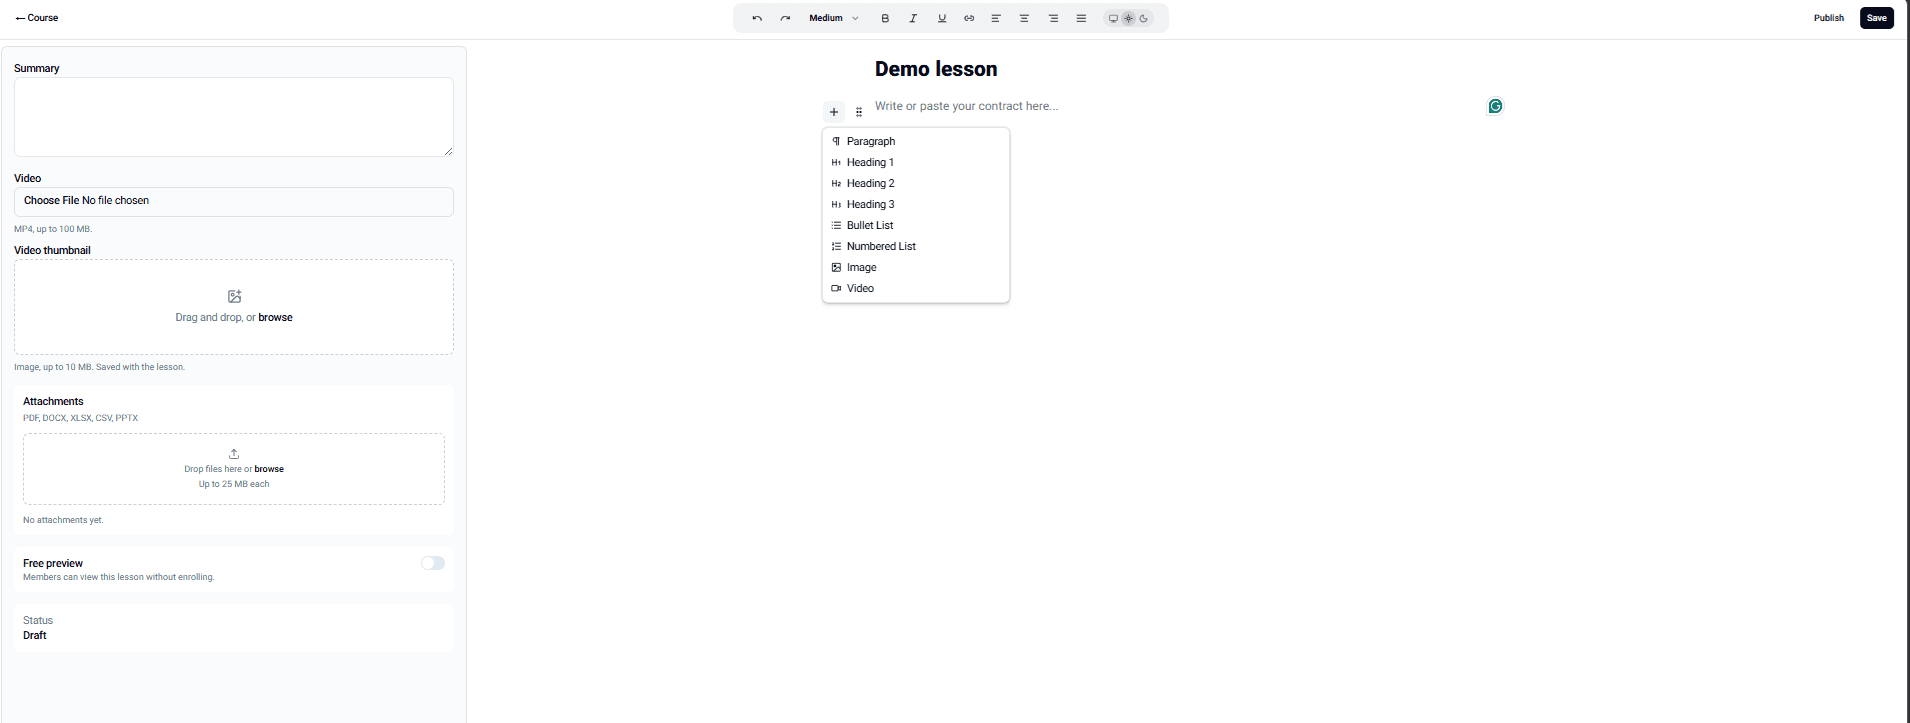
Canvas (the body of the lesson): hover over the canvas and click the + icon to add a block. Available blocks are Paragraph, Heading 1, Heading 2, Heading 3, Bullet List, Numbered List, Image and Video. The toolbar across the top carries undo and redo, text size, bold, italic, underline, link and alignment.
Click Save when you are done.
What success looks like
The course appears in the Courses list with a draft status badge and a content count reading, for example, 2 chapters / 1 lessons. Opening the course shows your chapters in order, each saved lesson carrying its orange indicator, and the lesson editor holding your video, attachments and body blocks.
Draft is the correct resting state until you are ready. Publishing is a separate, deliberate action at two levels: the lesson, from its three-dot menu, and the course, from the Publish button on the course page.
Notes & limits
- Save gates content. A lesson accepts no content until it has been saved once.
- Upload ceilings: video MP4 100 MB, video thumbnail 10 MB, attachments 25 MB each.
- Attachment formats: PDF, DOCX, XLSX, CSV, PPTX.
- The featured image uploads on save, not on drop.
$0.00means free. There is no separate free/paid switch.- Every course starts with an
Overviewchapter already created. - Draft is the default for both courses and lessons. Nothing reaches members because you saved it.
- Archive sits beside Publish on the course page. Prefer it to deletion when a course is retired but its content may be wanted later.
Planning guidance
Build the skeleton first, then fill it. Creating nine empty saved lessons in one sitting and writing them over the following weeks is faster than building each lesson end to end, because the save-then-edit constraint makes half-built lessons awkward to return to.
| Decide before you open the form | Example |
|---|---|
| What is the course replacing? | The syllabus PDF, the "new member" email, the technique you re-explain every term |
| Free or priced? | Free for onboarding and curriculum, priced for content a non-member would buy |
| How many chapters? | One per belt, term, or module. Members read the chapter list as a promise about length |
| Which lesson is the free preview? | Usually lesson one of chapter one, or the single most useful standalone lesson |
| Video or text? | Video for anything physical. Text and attachments for reference material members will scan, not watch |
One course built properly beats four half-built ones. A member who opens a course and finds three empty chapters learns something about your studio that you did not intend to teach.